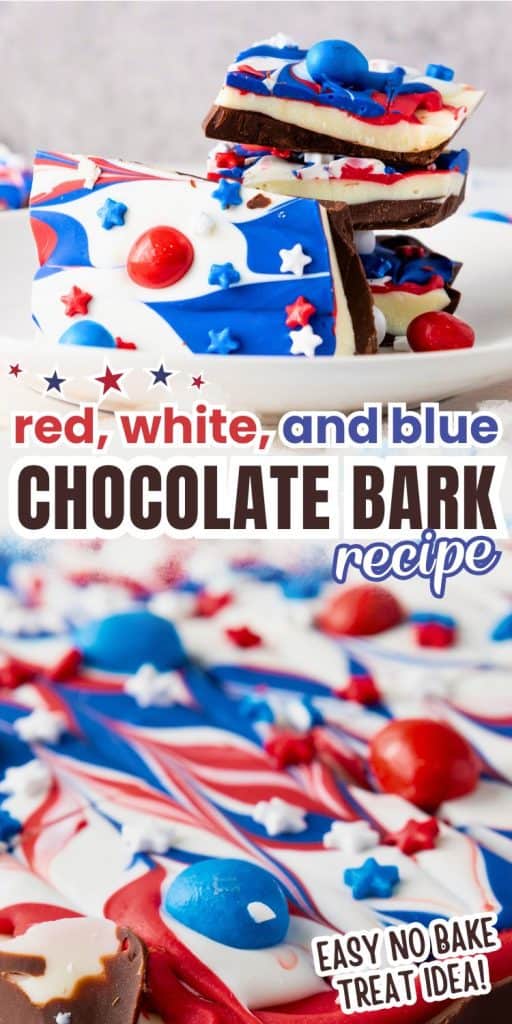
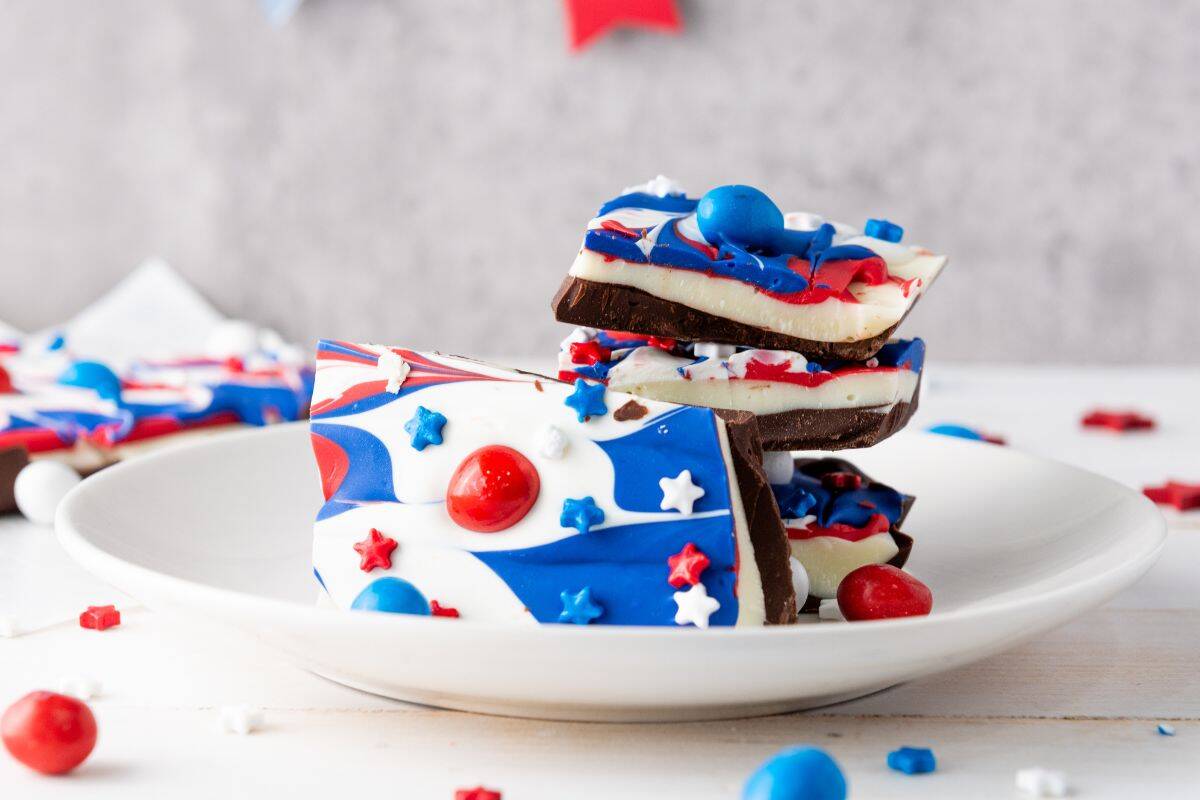
Looking for the ultimate show-stopper for your next summer bash? Look no further than this festive red white and blue chocolate bark. Whether you’re firing up the grill for Independence Day or hosting a family gathering for Memorial Day, these patriotic treats are guaranteed to be the star of your dessert table.
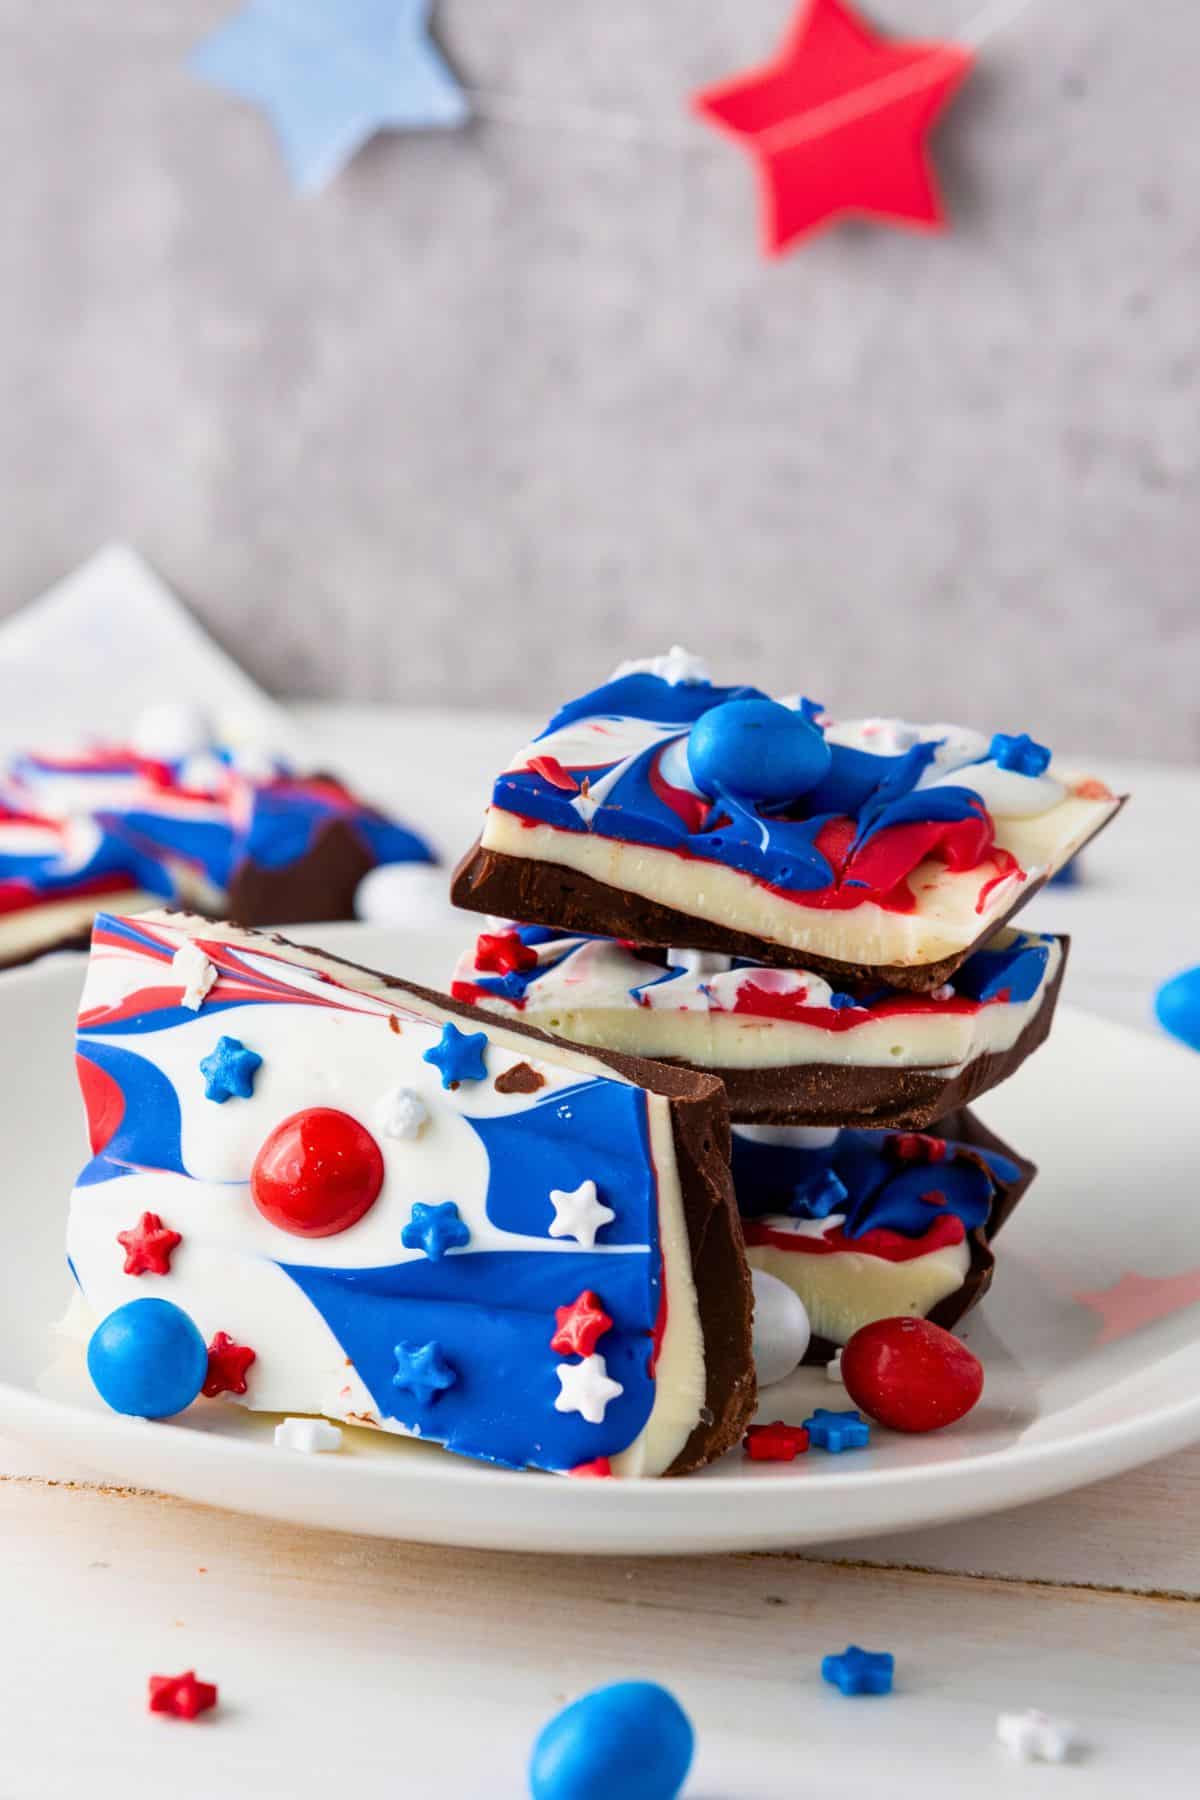
From backyard cookouts to neighborhood block parties, these red white and blue snacks are the perfect way to show off your festive spirit while keeping things stress-free. It’s a fun, kid-friendly no bake dessert everyone will be reaching for.
If you love to make patriotic treats, you may also like these chocolate dipped pretzel rods, these cute red white and blue jello cups, or patriotic rice krispies.
Why You’ll Love This Red White And Blue Chocolate Bark Recipe
Zero-Stress Prep: With only 15 minutes of prep and a simple microwave-only method, this is the ultimate no bake treat for busy hosts who want to stay out of the kitchen this summer.
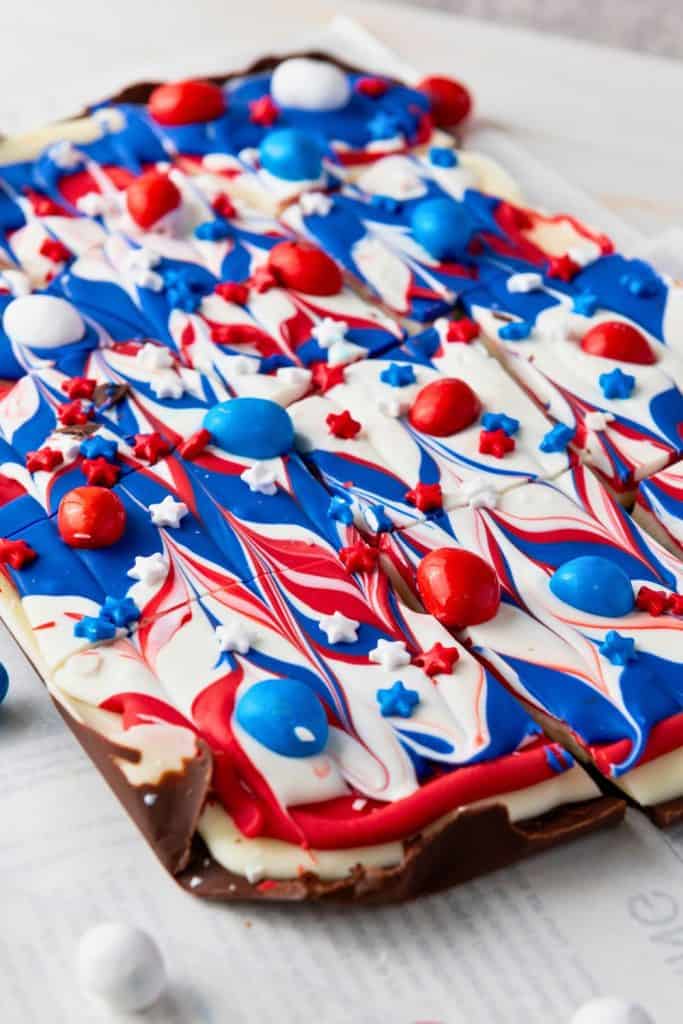
Visual Wow-Factor: The marbled candy melts and star-studded toppings create a stunning centerpiece that doubles as edible decor for any patriotic dessert spread.
Loved By All: Kids and adults alike will crave a piece of this patriotic bark thanks to the layers of sweet chocolate and the fun festive toppings.
Ingredients
To make red white and blue candy bark you will need the following ingredients. I cover a few of the key ingredients here, you can find the specific quantities and steps in the recipe card below.
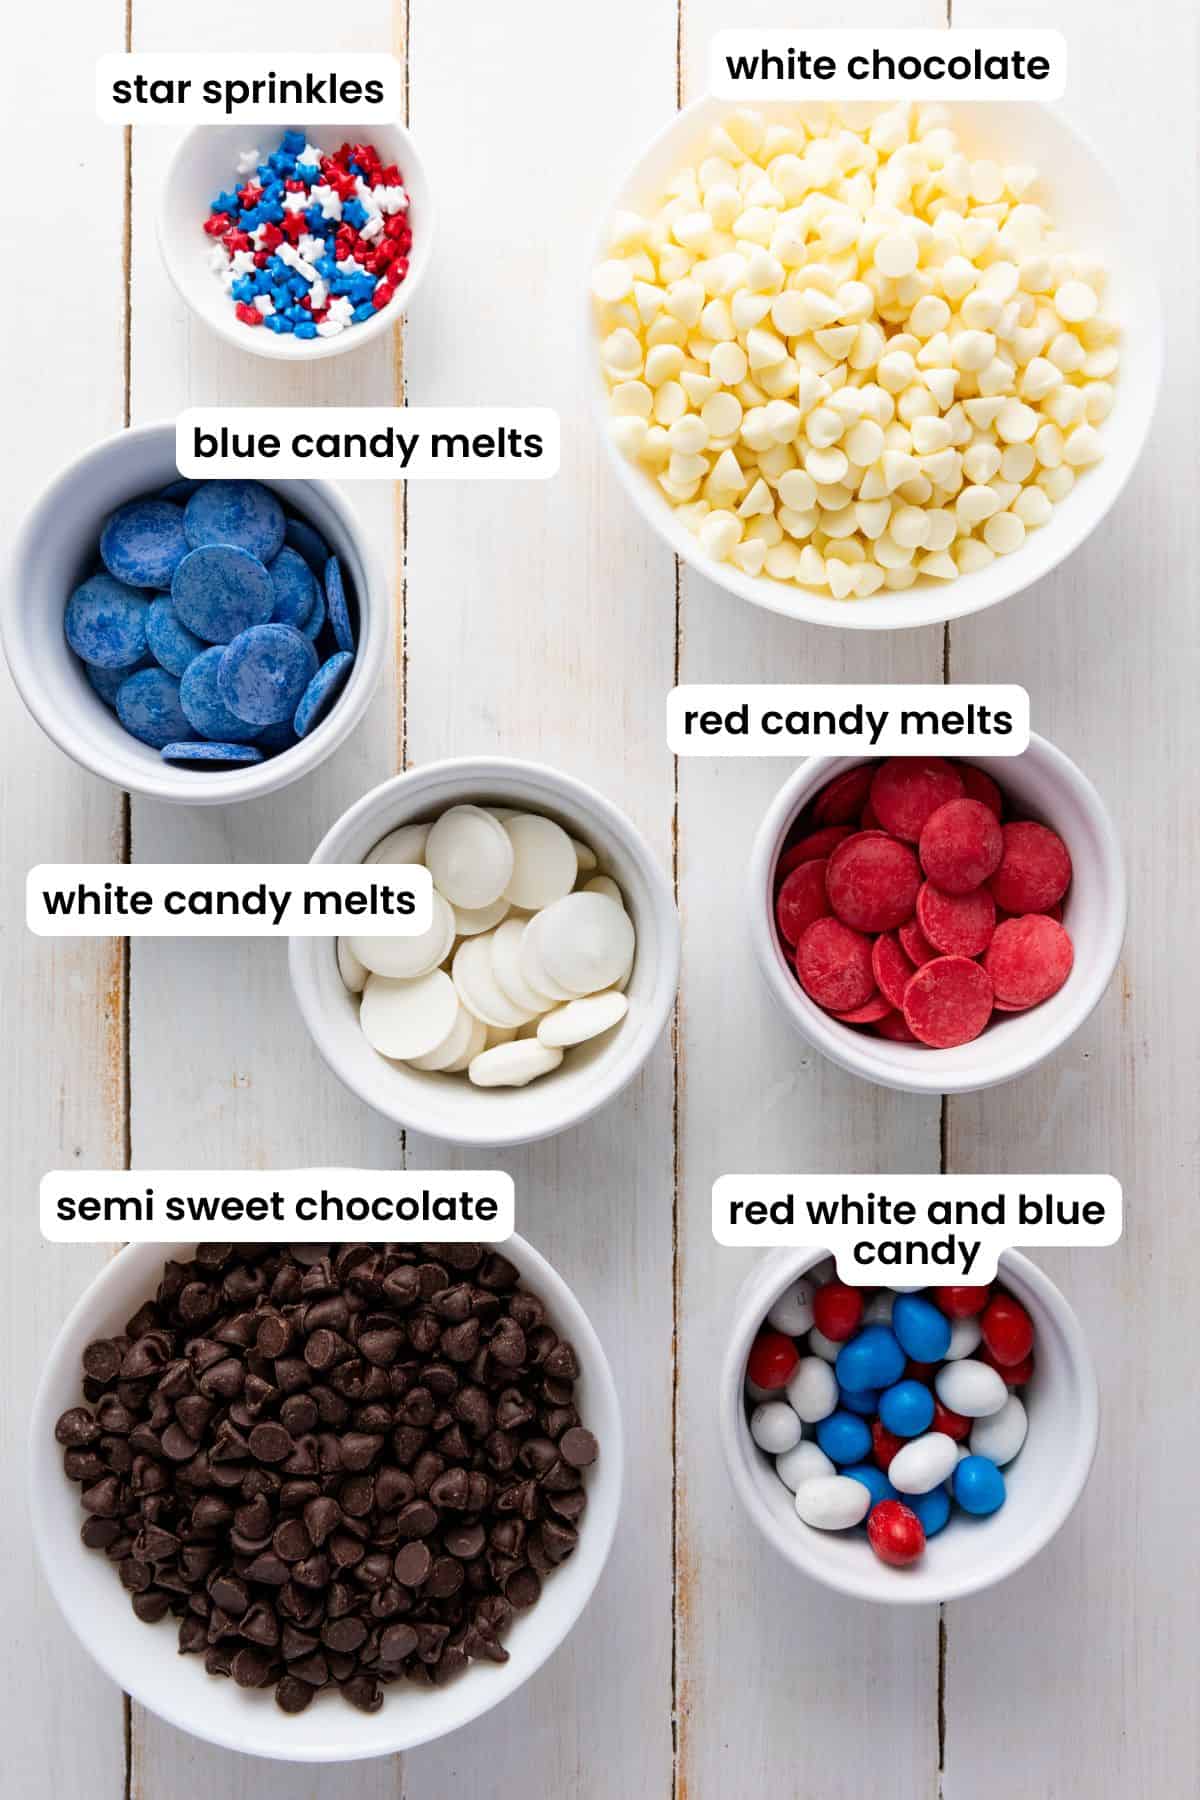
- Semi-sweet chocolate: As this recipe is purely made of chocolate, I strongly recommend using the best quality chocolate you can afford. It really does make a difference to the overall taste.
- White chocolate: Use chocolate bars or chips – again, using a good quality chocolate will make a difference.
- Red, white, and blue decorations: I use star sprinkles and red, white, and blue M&Ms, but you can use any sprinkles you like – there are so many festive options to choose from!
- Candy melts: It is very difficult (if not impossible) to achieve the color intensity required using food color and white chocolate, which is why I recommend you buy the red and blue candy melts for this recipe.
How To Make Patriotic Candy Bark
Here’s a quick overview of how to make patriotic chocolate bark at home. For the full recipe details, including ingredients and measurements needed, scroll down to the printable recipe card below.
You will need a baking pan, parchment paper, and a few small microwave-safe bowls to get started.
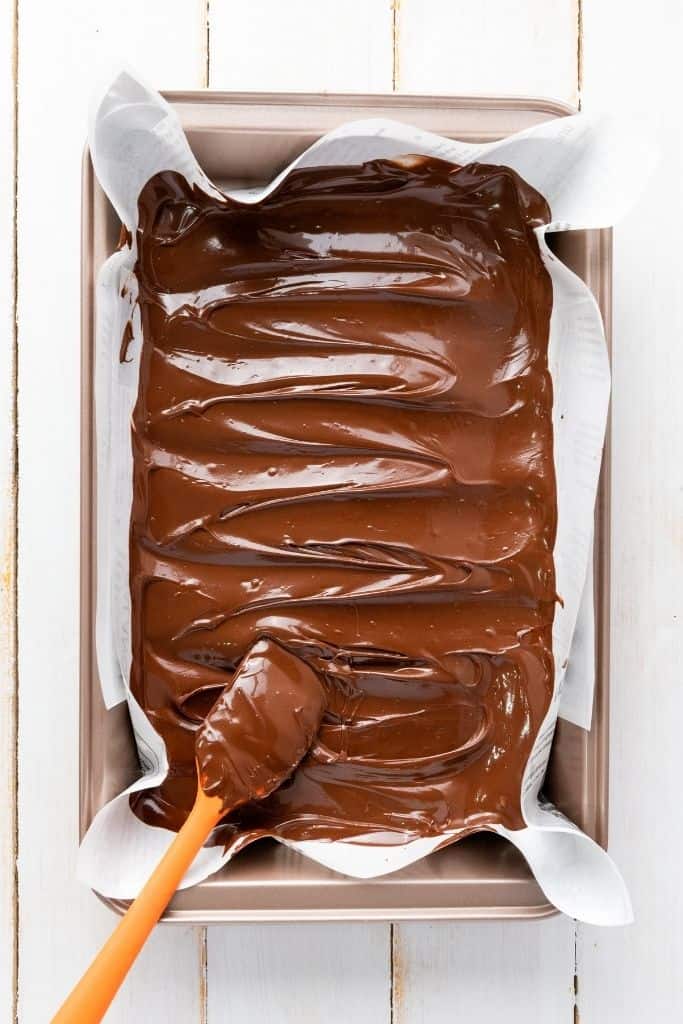
Step 1: Line a baking pan with parchment paper, leaving enough overhang to easily life the bark out of the pan once hardened.
Melt the semi-sweet chocolate in the microwave, just 30 seconds at a time, stirring in between, to prevent the chocolate seizing. Pour into the pan and spread to create an even layer. Refrigerate for at least 30 minutes to harden.
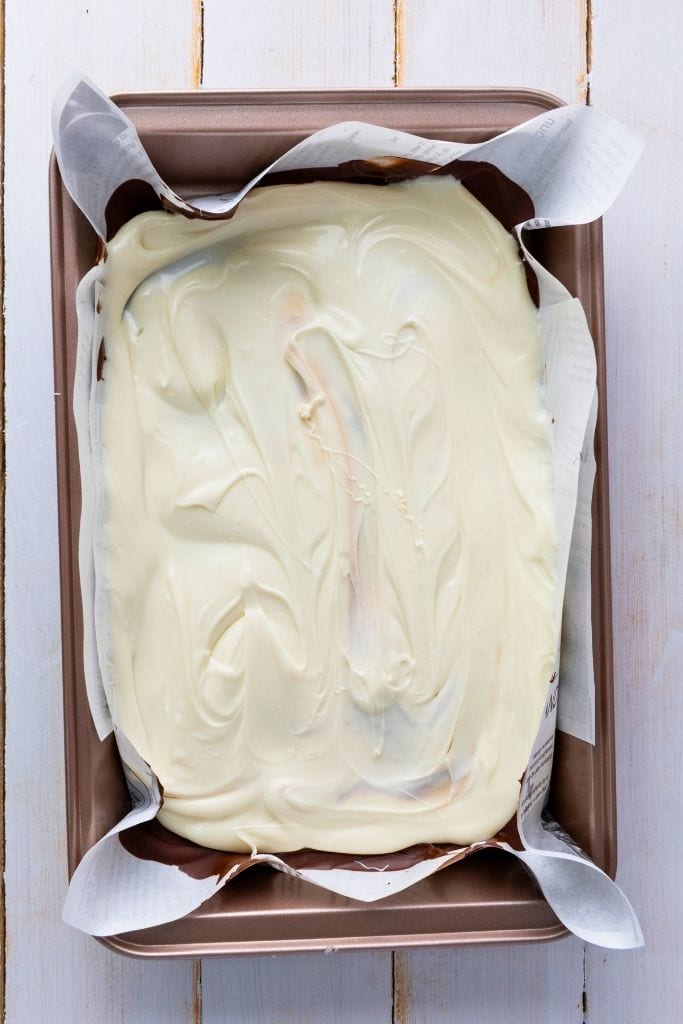
Step 2: Melt the white chocolate, again in short 20-30 second increments until just melted. Pour over the top of the hardened semi-sweet chocolate and carefully smooth out into an even layer. Return the pan to the fridge for another 30 minutes, or until hard.
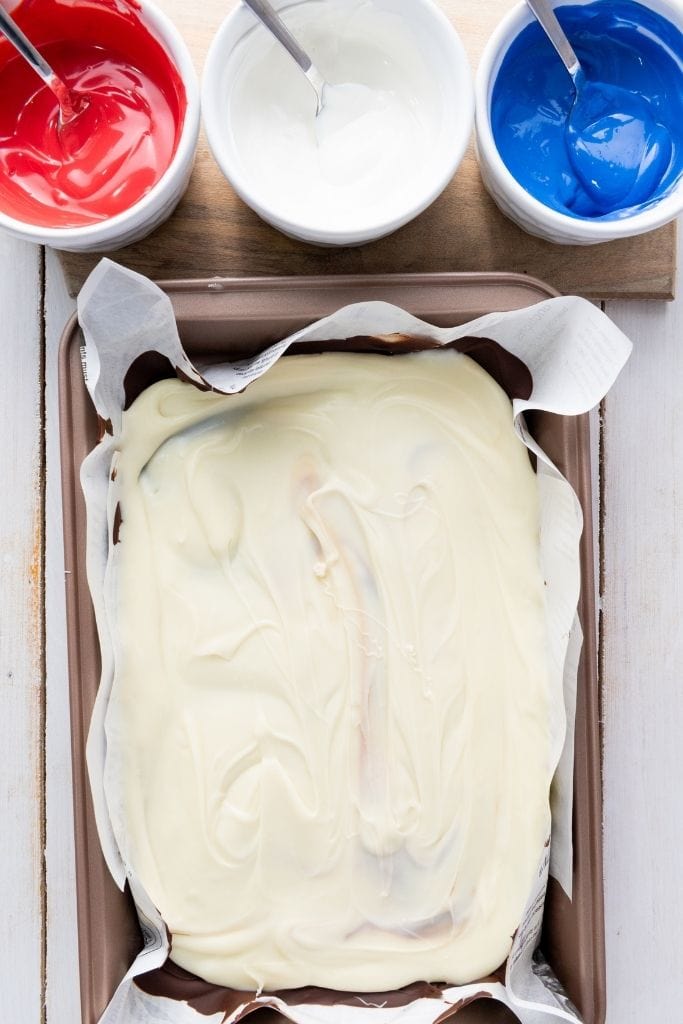
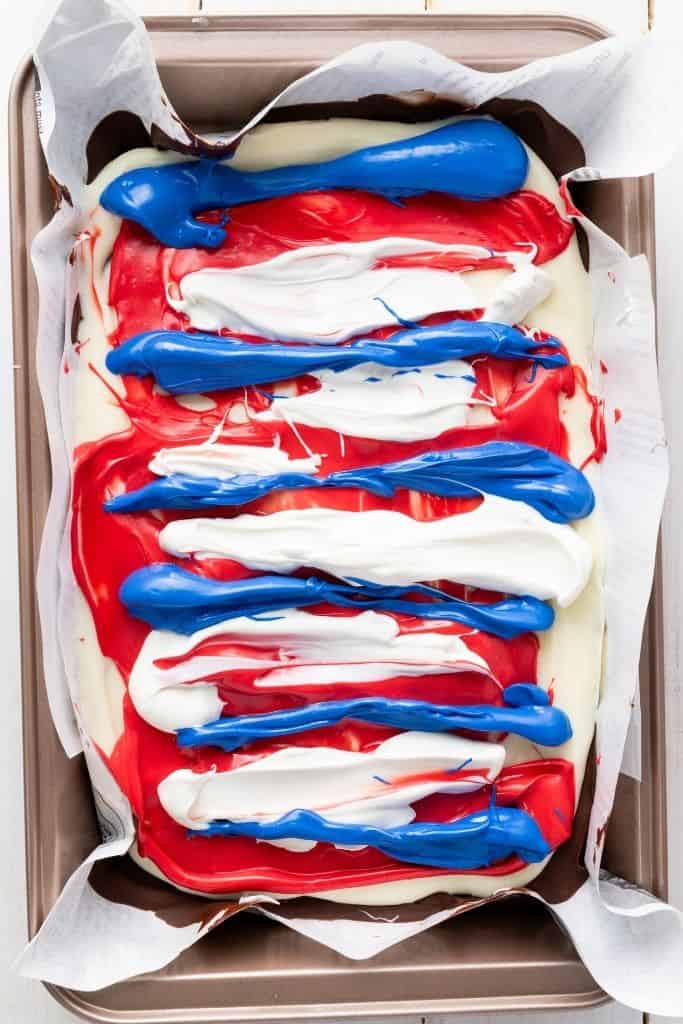
Step 3: Melt the red, white, and blue candy melts in three small microwave proof bowls. Remove the pan from the fridge and use a spoon to spread the red melted chocolate over the white chocolate layer.
Then spoon the white melted chocolate in thick lines over the red chocolate, leaving space in between each line.
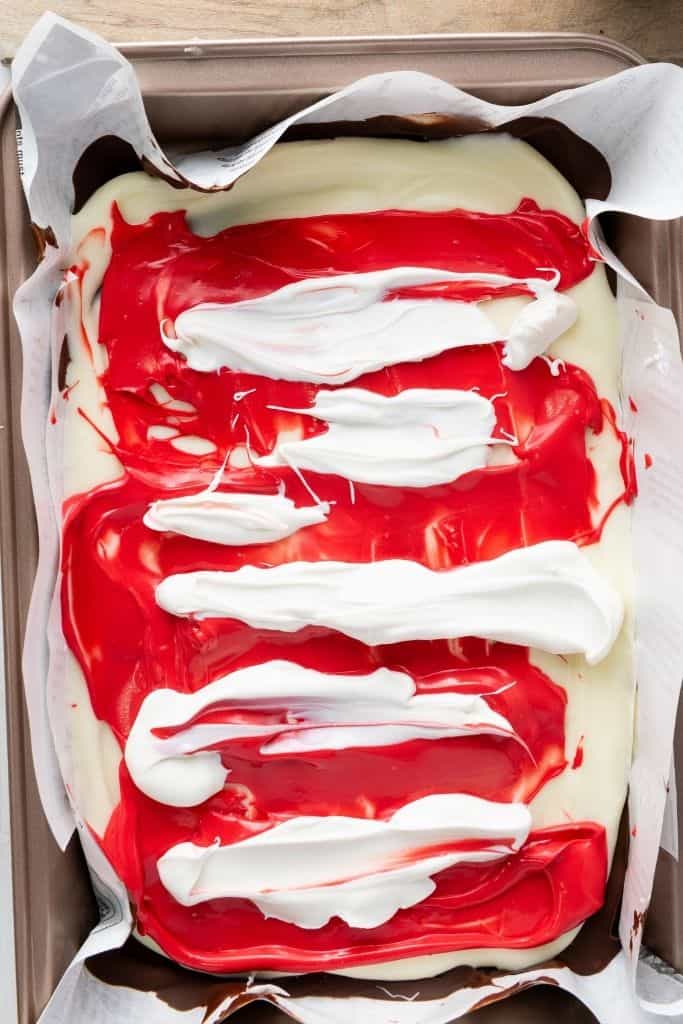
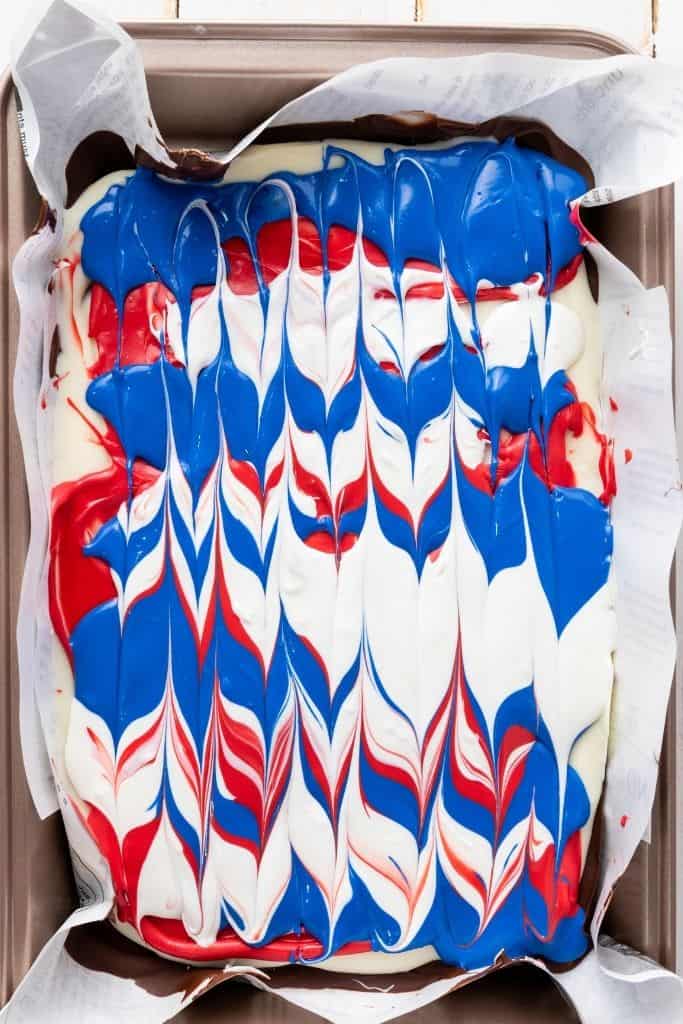
Repeat with the blue chocolate. Then while the chocolate is still soft, use a toothpick or sharp knife and gently drag lines through the layers of chocolate, working from top to bottom and bottom to top – creating a marbled effect.
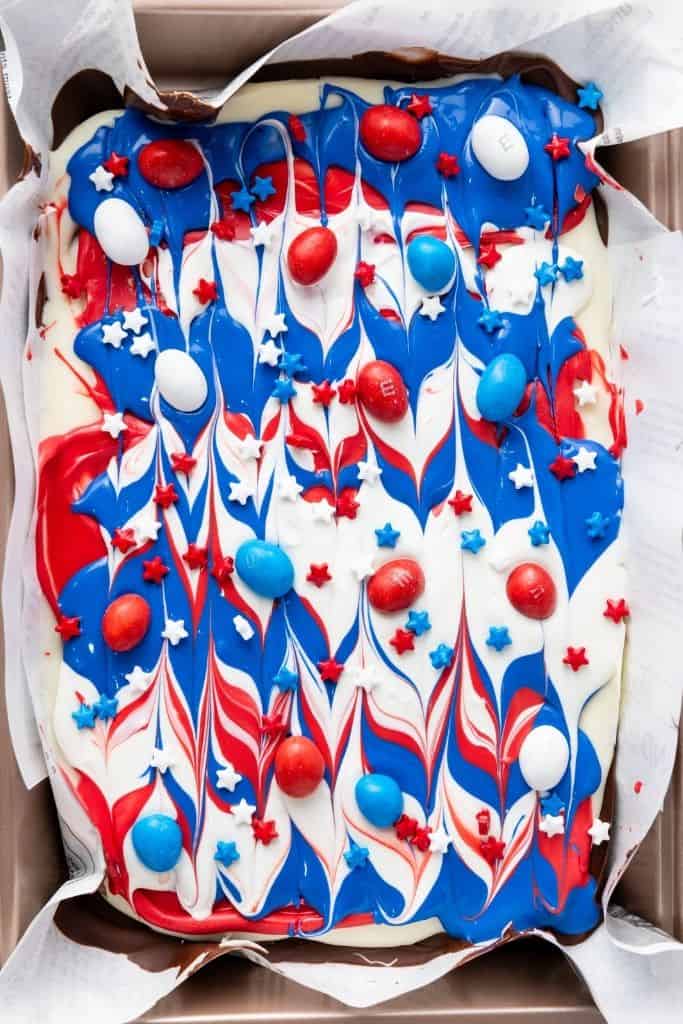
Step 4: While the chocolate is still warm, decorate with your festive sprinkles and M&Ms – ensuring full coverage over the whole width of the pan. Gently press the M&Ms a little into the chocolate, so they stay put once the chocolate hardens.
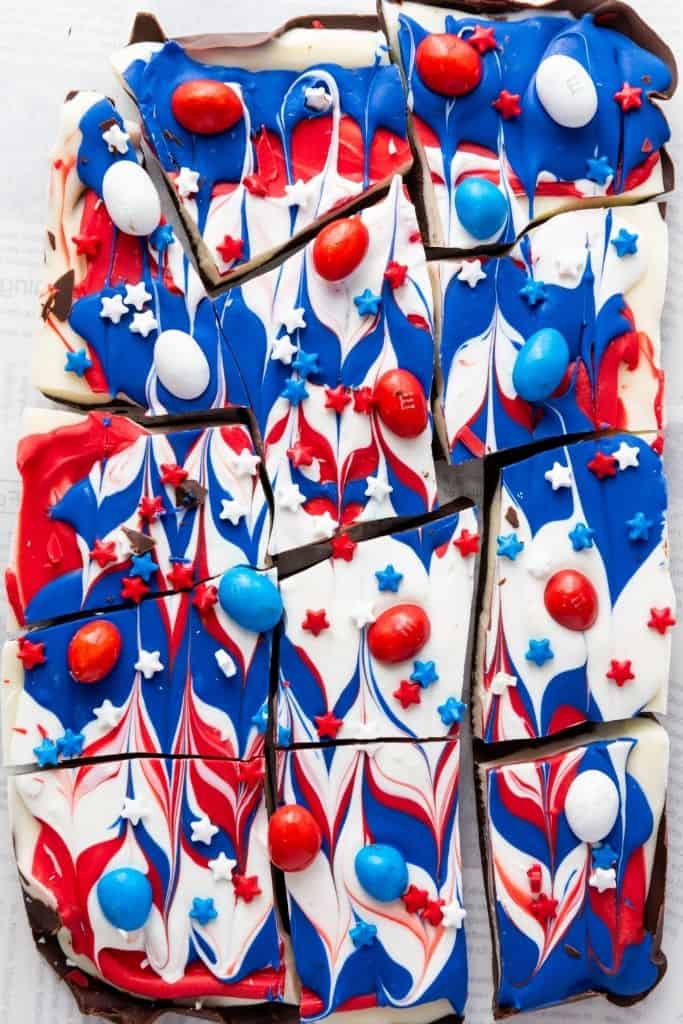
Step 5: Return the pan to the fridge to harden completely – at least 30 minutes. Then when ready to serve, remove the pan from the fridge and lift the candy bark out of the pan. Break or cut the bark into pieces.
Serve and enjoy!
Recipe Tips For Success
Patience is key for clean layers: Make sure the semi-sweet chocolate layer is completely hardened before pouring the next layer. If the bottom layer is still soft, the colors will muddy together instead of showing off those distinct stripes.
Prevent seizing with gentle heat: When melting your chocolate and candy melts, stick strictly to the 30-second bursts and stir thoroughly in between. Chocolate can burn or “seize” (become clumpy and dry) quickly if overheated, especially white chocolate.
Swirl while warm: Have your toothpicks and toppings ready to go. You only have a few minutes to swirl and decorate before the candy sets, so work quickly while the drizzle is still warm for that perfect marbled effect.
Use the parchment overhang: When lining your pan, leave a little extra parchment paper hanging over the sides. These act as “handles” that allow you to lift the entire block of bark out of the pan easily once it’s set.
What To Serve With Chocolate Bark
This bark recipe is perfect for a patriotic cookout, 4th of july celebration, or memorial day bbq.
Serve alongside these cute patriotic rice krispie treats.
How To Store Chocolate Candy Bark
Store: Chocolate bark can be stored at room temperature for up to a week, or up to 2 weeks in the fridge.
If the weather is hot and/or humid where you are, the candy bark is best stored in the fridge so it doesn’t soften.
More Holiday Treats Recipes
- These red white and blue dessert ideas are perfect for holiday celebrations.
Loved this recipe? Leave a review, and join me on Facebook and Pinterest for more tasty recipe ideas.

Red White And Blue Chocolate Bark
Equipment
Ingredients
- 2 cups semi-sweet chocolate chopped
- 2 cups white chocolate chopped
- ½ cup red candy melts
- ½ cup white candy melts
- ½ cup blue candy melts
- 2 tablespoons red white and blue sprinkles
- ¼ cup red white and blue M&Ms
Instructions
- Line your baking tray with parchment paper, with enough overhang to lift the candy bark out of the tray once firmed up.
- Chocolate layer: Place the chopped semi-sweet chocolate in a microwave proof bowl and heat in 30 second increments, stirring after each time until just melted. Pour into the prepared tray and use a spatula to spread into an even layer.
- Place the tray in the fridge for around 30 minutes for the chocolate to harden.
- White chocolate layer: Place the chopped white chocolate in a microwave proof bowl and heat in 30 second increments, stirring after each time until just melted. Pour into the tray over the hardened chocolate and use a spatula to spread into an even layer.
- Place the tray in the fridge again to harden completely – around 30 minutes.
- Drizzle the colored melts: Melt the red, white and blue candy melts in separate bowls. Use a spoon to drizzle first the red, then the white, and finally the blue melted candy over the hardened chocolate base.
- Decorate: While the colored chocolate is still soft, drag a toothpick or sharp knife through the top to create a marbled effect. Sprinkle your red white and blue sprinkles and candy over the top. Press the candy gently into the chocolate so it will stay put once the chocolate hardens.
- Place the tray back in the fridge to harden completely. Once fully set, gently lift the bark out of the tray using the parchment paper overhang, and place on a chopping board. Chop or break the candy bark into pieces. Serve and enjoy!
Notes
Nutrition
Nutrition information is automatically calculated, so should only be used as an approximation.
Pin for later!